


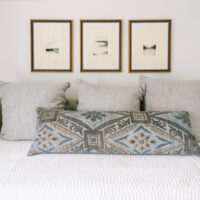


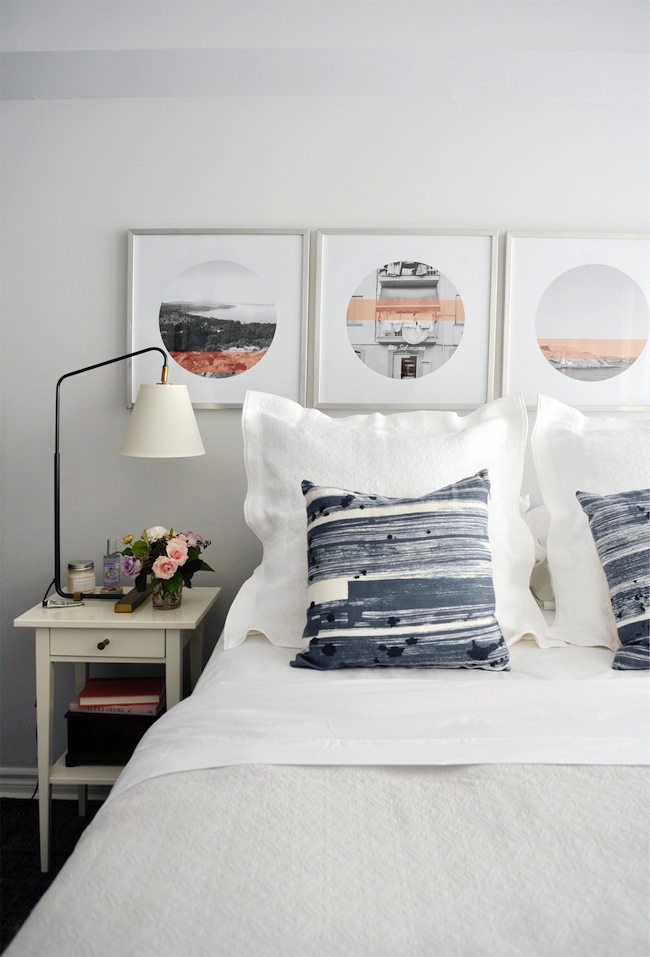
Of all the things that I’ve posted over the course of the last 6 years, one of the questions I get asked most is often is where to purchase the art above our bed. It always makes me smile as it was a bit of a last minute decision one day pre-bedroom reveal shoot, and what most people don’t realize is that it was actually a DIY art project (and unfortunately not sold in stores). Consisting of a series of manipulated photos from our travels over the years, I originally considered opening a small print shop to sell them to whomever showed interest, but thought that I’d do even better and simply share the how-to myself. Originally featured on House & Home last week, following are my steps for beautifully simple, totally personal, DIY art.
STEP 1
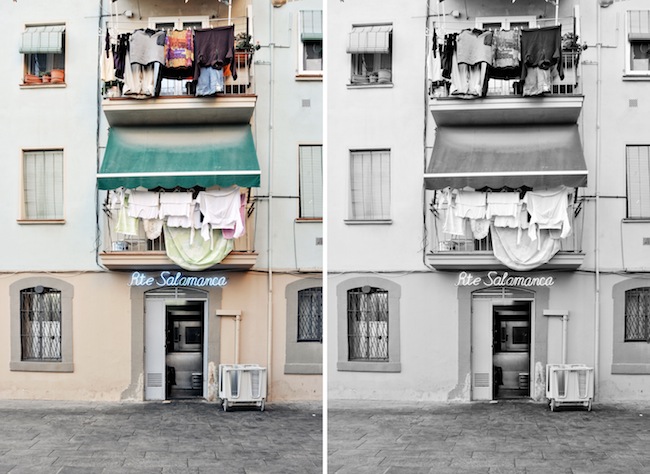
Open your photo of choice in Photoshop and convert it to black and white (click image > mode > grayscale).
STEP 2
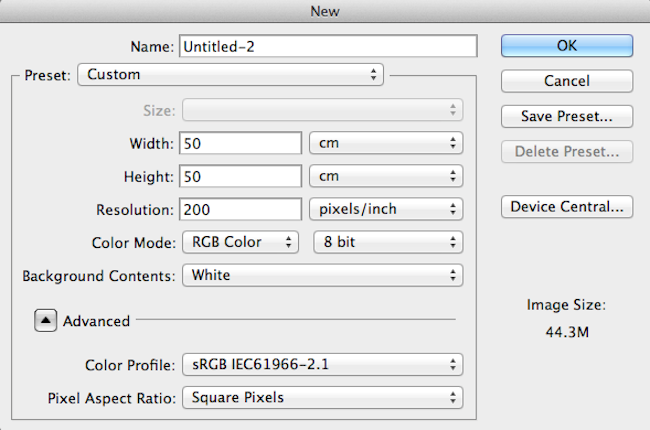
In Photoshop, click file > new > change the width and height to 50cm each.
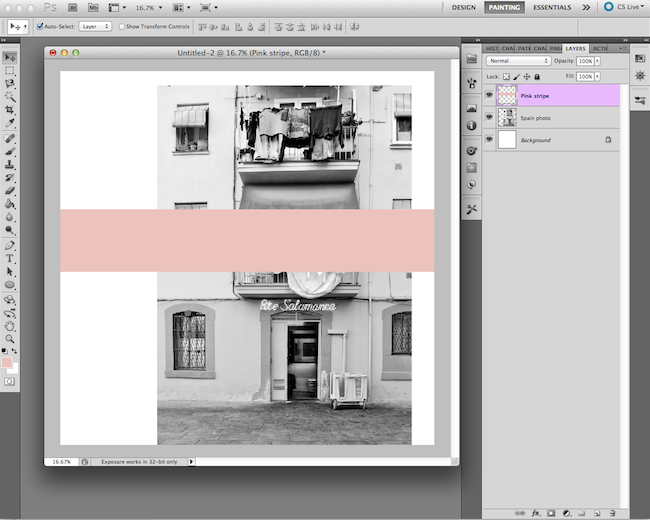
STEP 3
Drag your black and white photo into your new 50cm x 50cm canvas. Add a new layer, change your paint color to your striped color of choice, click on the rectangle tool and create a stripe that spans across the entirety of your canvas.
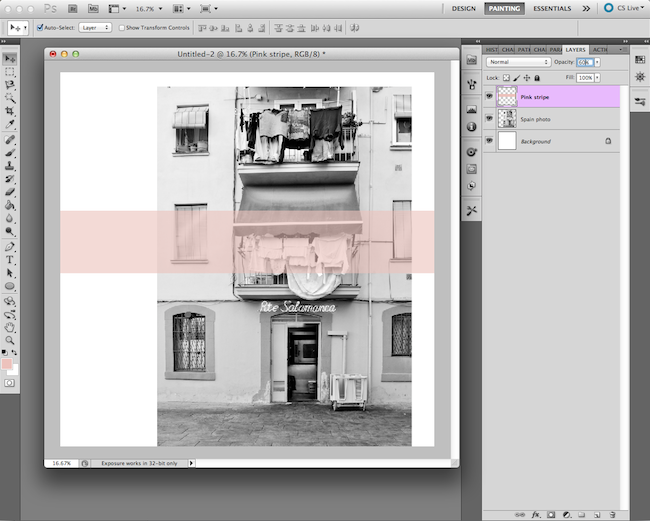
STEP 4
In the layers palette, play with the opacity of your stripe (I set mine at 60%).
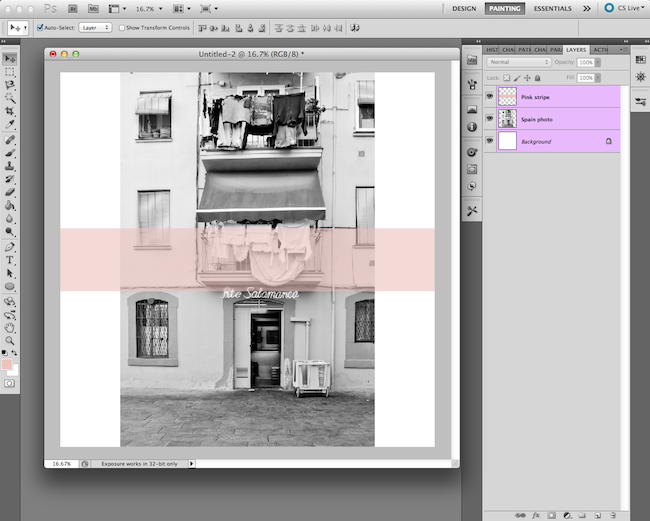
STEP 5
Highlight all of your layers (including the background), click on the “move tool” and, in the top toolbar, click on the “align vertical centers” and “align horizontal centers”. This will ensure your photo is placed perfectly in the center of your canvas.
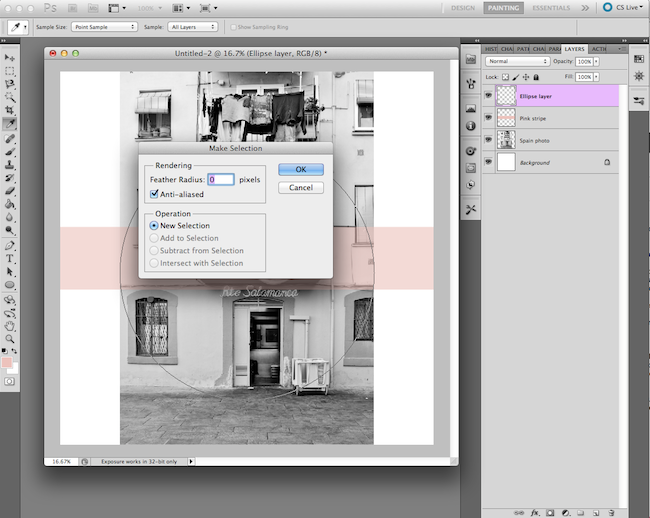
STEP 6
Add a new layer. Click on the “ellipse tool” and in the top toolbar make sure “paths” is selected (it’s the icon with the dots and the pen tip). Holding down the shift key, create a large circle in the center of your canvas. Right click on the circle > make selection > click “ok”.

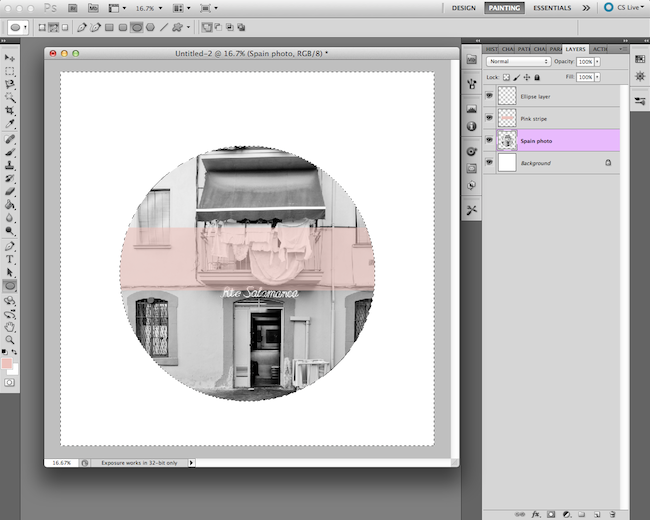
STEP 7
In the top toolbar, click select > inverse. Highlight your “pink stripe” layer and click edit > clear. Highlight your “photo” layer and click edit > clear. You then might need to play around slightly with the location of your circle to make sure it’s still centered.
STEP 8
Have your image printed full size (50cm x 50cm) at your local print shop, and it should fit perfectly into an Ikea Ribba frame! Note: if you’re creating a series of them you may want to play around with the location of your stripe on each photo to create added interest.

filed in /


i am having issues