


.
I’ve been getting a number of questions regarding how I edit my pictures (specifically these ones), so I thought I’d take a moment to show you how I do it. Before I begin, I should probably tell you that when I began editing them, I originally used Sydney‘s photoshop tutorial (and if you don’t read her blog, you’re missing out on some ridiculous awesomeness). I’ve adapted it slightly along the way to suit my needs (and it often gets adapted even more depending on the image), but this is a great starting off point for those of you who want to be in the know. Unfortunately, in order to edit them with this method, you’ll need access to photoshop (a small amount of knowledge of the program would also help – I’ve tried to be as clear as possible but if you’re new to photoshop and need additional help feel free to shoot me an e-mail, or leave a comment). So here it goes!
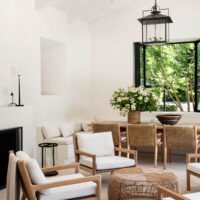
Step 1:: Import your image into photoshop and open the layers palette. Right click on the background layer and select “duplicate background” so that you aren’t working on the original file (in case you would like to keep it in it’s original state for future use.) This is the image I’m going to be working with:
Step 2:: Look at the top left bar. You see where is says “Layer”? Click on it. And then click on the following: new fill layer, solid colour, and select a navy blue (I chose #070144). Next, change it’s opacity to 75%. It should look something like this:  pretty, right?
Step 3:: Once again, go up to the top left and click layer, new fill layer, solid colour and select a peach colour (I use #de9b82) to end up with this:

Step 4:: Annddd again, for good measure; click layer, new fill layer, solid colour and select a light pink (I use #fed1eb). Next, change it’s opacity to 50%. At this point your picture should look something like so:

Step 5:: For the last time I swear; click layer, new fill layer, solid colour and select navy blue again (#070144). Change the opacity to 18% to end up with this:

Step 6:: And once you’ve gotten this far, duplicate your background image once more, and drag it to the very top of your layers palette. Once it’s at the top, click on the drop menu at the top of your layers palette that says “normal” and change it to soft light for this lovely, vintage appeal.
 And there you have it!
You can feel free to play around with the layers, the opacity, the fill colours, the brightness, the contrast… Heck, you may even like the image after the first step. Like most things in life (at least I like to believe so), there are no real rules.
And because I like a solid before and after, here you go:

filed in /


